Updated Dec. 12, 2023 12:01 PM
How to Keep Your Garage Warm During Winter
Although mainly designed to store cars and other items, garages can be converted into a variety of other living spaces, including workspaces, TV dens and cozy bedrooms. But there’s one factor that keeps many homeowners from repurposing this space — they’re uninsulated. When winter hits, most garages become cold and uncomfortable. However, insulating your garage is a more straightforward process than you might imagine, and doing so can make this space just as warm as any other room in your home.
Table of Contents:
- 3 Ways to Keep Your Garage Warm During Winter
- 7 Steps to Prepare Your Garage for Winter
- How to Insulate a Garage Door for Winter
If you’re interested in taking on this rewarding DIY project, check out our tips on how to warm a garage’s temperature throughout the coldest months of the year, or contact our team of professionals today.
3 Ways to Keep Your Garage Warm During Winter
Turning your garage into a warm and toasty space involves a few steps, all of which should be completed before winter arrives.
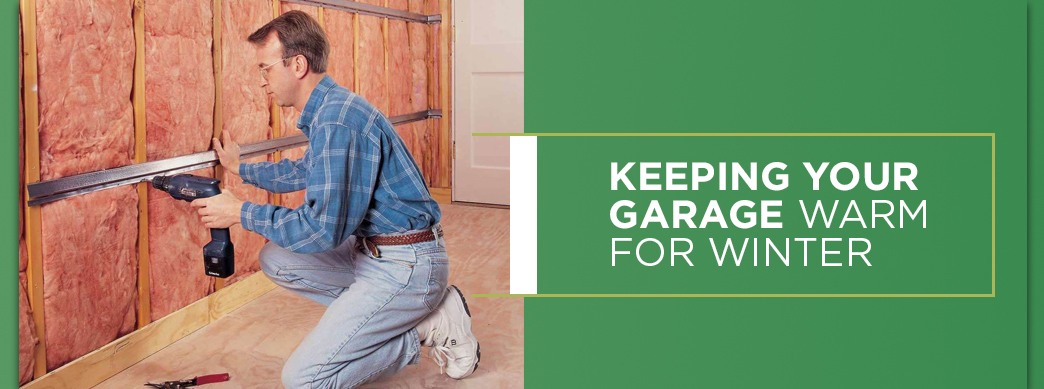
- Reduce heat loss by insulating walls
- Insulate garage door and inspect weatherstripping
- Create heat by installing a heater
1. Insulate Your Garage Walls To Limit Heat Loss
Once you’ve sealed all the gaps in your weatherstripping, you can start to insulate your walls. You will want to use fiberglass batt insulation to do this, and it is essential to choose the correct thickness — which will depend on your garage walls. Make sure to read the installation guide carefully before installing the insulation.
2. Insulate Your Garage Door
Even after replacing the weatherstripping on your door, if the garage door itself is not properly insulated, you could still lose a considerable amount of heat.
You can find several specialized kits to help you with this task, which includes fiberglass, foam boards and reflective barriers.
When insulating a garage door, make sure the insulation is carefully cut so that it fits the garage door panels perfectly. Then, use an adhesive to secure it in place. If you’re having trouble with this task or still feel cold after installing the insulation, the best option may be to replace your current garage door with an insulated one.
Some excellent insulated garage doors have been developed and are highly effective at keeping the heat from escaping — which can keep you warm and can save you significantly on heating bills during the winter.
3. Install a Space Heating Unit In Your Garage
Weatherstripping and insulation can keep cold air from coming in, but they may not be enough when it comes to heating your space. If you want to keep your garage warm, installing a unit heater is a good idea. These appliances do not take up much space and are quite affordable. You can choose an electric or gas heater, and if you want a highly energy-efficient option, you can opt for a mini-split heat pump.
Even with a heater, insulating your garage door and walls is smart. Insulation prevents the heat from escaping and helps your heater be more effective at keeping your garage warm.
7 Steps to Prepare Your Garage for Winter

Before winter even arrives, here are a few things you can do to get your garage ready:
1. Clean
Before you can properly winterize the garage, you need to thoroughly clean the space. Take a stiff broom and give the floor a thorough sweeping, removing all dirt, debris, leaves, mulch and insects. Remove all cobwebs, dirt and dust on the walls as well. Once everything is in its proper place, you’ll be able to move around and access the parts of the garage that relate to its warmth, including the garage door, your winter products, pipes, the water heater, the heater and each wall.
2. Inspect the Weatherstripping
Close the garage door, turn the light off and look for any light coming in from the outside. If you find any gaps, this means heat can escape. Inspect your weatherstripping around your door and replace any seals that are damaged or missing. It is normal for it to become cracked or brittle with time.
When removing your existing weatherstripping, make sure to scrape off any remaining sealant, then apply the new weatherstripping with care. Measure and align it properly so that the seal is tight and able to block out cold air and wind. To do this, close the door. Then position the weatherstripping so that the flap is flat against the door.
It’s also recommended that you clean your weatherstripping using a good all-purpose cleaner. When weatherstripping is well-maintained, clean and free of debris, it’s more able to do its job for longer — potentially years to come — without breaking down.
3. Inspect the Garage Door
All garage doors require an annual inspection, and right before winter is a perfect time for this service. Hire a professional to take a look at the door and identify any issues that may lead to a malfunction. If your door needs to be repaired, it’s best to get it fixed before winter arrives — not when it’s 10 degrees outside, and your garage door won’t close.
Request Your Garage Door Service
4. Lubricate Moving Parts
Ensuring all moving parts of your door are lubricated can help your door function properly and may prolong its lifespan. Cold weather can cause moving parts of your garage door to freeze up. Fortunately, lubricating these parts can help keep the door in good working condition all winter long.
5. Make Sure You Can Access Your Winter Products
Place any equipment you will need to access during the winter, such as shovels, snow blowers and rock salt, where they are easy to access. If they’re buried somewhere in the back of the garage, now is an excellent time to bring these items out. This way, you’ll be able to access them quickly if necessary — including those times when your garage is snowed in, and you need something to clear away the snow.
6. Insulate Your Water Heater
If your water heater happens to be in your garage, insulating it may be a good idea. If you own a newer one, chances are it already comes with insulation. If you have an older model, find out its R-value, which measures thermal resistance. Its R-value should be at least 24. If the value is any lower, consider adding insulation.
7. Protect Exposed Pipes
If you have pipes that carry water from the garage into your home, winterize them by shutting them off and purging the water from them. Then use foam or plastic pipe insulation to cover up exposed water lines. A more economical way to do this is with old towels and duct tape.
How to Insulate Your Garage Door for Winter
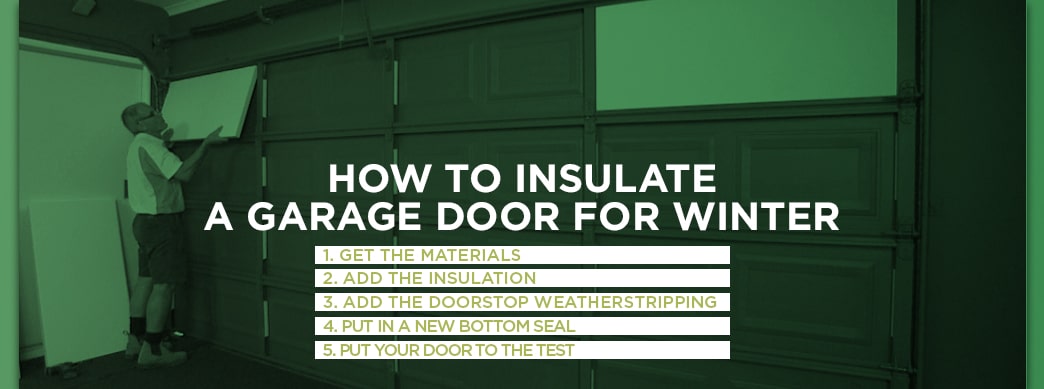
As you learned above, insulating your garage door is an important part of making your garage comfortable in cold weather. Below, we’ll go over the steps involved in insulating your garage door and the materials you’ll need to to do so.
Insulated garage doors with an R-18 energy efficiency can warm garages by 12 degrees in the winter and cool them by 25 degrees during the summer, which leads to energy savings. With the cost of the garage door itself, however, it may not make sense to replace the one you have just for the energy savings. You can insulate your existing door, though, and add doorstop weatherstripping and a new bottom seal to increase your comfort and energy cost savings.
This entire job can typically be finished in about an afternoon. The steps are as follows:
1. Get the Materials
First of all, you’ll need to make sure you have the following tools:
- A utility knife
- A saw
- A tape measure
- A straightedge
- A dust mask
- A hammer
- Nails
In addition to the insulation, you’ll also want to purchase some vinyl weatherstripping for your garage door. Make sure to get enough to seal both the sides and the top. You will want to get a bottom seal as well, also made of vinyl, to go on your track. If you notice your track has any damage, it should be replaced.
2. Add the Insulation
To insulate your door, you’ll first want to ensure you have the right type of insulation — which depends on the R-value you’re looking for and what kind of door you have. The most common types of insulation are:
- Foam board panels: These are rigid panels that are typically crafted from polystyrene. They are usually between 1/2 inch and 1 inch thick and are effective without adding much bulk. R-values for this option range between R-3.3 and R-6.5.
- Reflective insulation: Reflective insulation comes in rigid boards or in rolls, and it has a reflective aluminum covering that is applied to one or both sides. Since it reflects radiant heat, this option is ideal if your garage gets very warm during the summer time or if you live in a warm climate. The typical R-value for reflective insulation ranges between R-3.5 and R-6.
- Batt insulation: Batt insulation is flexible, and it’s also often used as insulation for exterior walls. It’s constructed from fiberglass with a backing of foil or paper to act as a barrier for moisture and air. The typical R-value range for this insulation type per inch of thickness is R-3 to R-4. One note, however, is that this may not be the best option for garage door insulation if you’re not using a kit.
For most doors, rigid insulation options are the easiest to use. With steel doors, though, flexible insulation, such as batting, can also work because it can be stuffed in the frames that surround the panels.
Once you have determined the insulation you need, you can either go with an insulation kit or just gather all of the supplies yourself. The advantage of a kit is that it includes a more complete set of materials — such as gloves and a utility knife — as well as pre-cut panels you’ll just have to trim down to fit your door.
As far as the installation process with a kit, if you’re using the R-8 fiberglass vinyl-faced insulation kit, for example, you’ll follow these steps:
- Clean the Product. Wash each panel using a rag and a cleaning spray. Then, rinse them using clean water and let them dry out.
- Install the Retainer Pins. Locate the point that is exactly one foot from each of the panel’s edges and exactly halfway between the two horizontal rails. Mark this point, then take off the sticky backing paper and stick the base of the retainer pin on the panel. Two retainer pins should be placed on every panel.
- Cut up the Batting. Roll the batting out on plywood with the vinyl facing down. Then, measure the dimensions of each panel and mark these measurements on the batting. However, add one inch to both the height and the width to ensure a tight fit. As the size of each panel might be different along the door, measure them as you go along instead of pre-cutting all of them using a single measurement. Use a utility knife to cut the panels while compressing the insulation with a straightedge.
- Insert the Batting. Take the insulation you cut, center it in the panel and push it into the retainer pin until it pops through the vinyl side. Then, put the retainer cap on the end of the pin, and it should snap into place.
- Repeat. Continue this process until you have covered all the panels with the insulation.
If you decide against a kit, the installation process will be very similar. You’ll likely just have more to cut, and you’ll need to make sure you have all the necessary tools and other materials — such as a way to attach your insulation to the door. Most people go with rigid panels and cut them to the correct size with a table saw or a sharp utility knife.
3. Add the Doorstop Weatherstripping
Now it’s time to seal around the door:
- Beginning at the top of your garage door, fasten the weatherstripping to the top jamb. Temporarily secure the stripping by pounding in the nails only halfway.
- Attach the side doorstops in the same fashion. The top and side stripping should meet at a 45-degree angle.
- Put pressure against the door to see how it might deal with strong winds. Then, adjust the doorstops inward so that it will seal against the door even in high winds.
- Hammer in the nails in completely. If you can’t properly adjust the doorstop because your door has too much play — or light is coming through the weatherstripping — take out the hinges and replace them with spring-loaded ones that press the garage door against weatherstripping.
4. Put in a New Bottom Seal
Most garage doors feature a track at the bottom that holds a vinyl seal. The sun can cause this vinyl seal to harden, crack or break off, allowing cold air to enter. To retain this seal, the slots found at each end are often crimped. Open these crimps and take out the old seal, and then put in your new one.
5. Put Your Door to the Test
If your door is correctly balanced, it should stay in place if it is lifted partway and then released. However, because insulation makes the door heavier, the balance may be thrown off. If your door falls down when you release it, call a professional to readjust the tension of the springs. Ignoring this problem may cause damage to your garage door opener.
Benefits of an Insulated Garage Door
Besides keeping you more comfortable, winterizing your garage door provides many other advantages:
- It can help keep the rest of your home warm. Cold air won’t be seeping into the rest of your living space from the garage.
- It can lead to energy cost savings. If heat isn’t constantly leaking through your garage door, you’ll spend less on heating.
- It reduces rusting. A well-insulated and well-heated garage keeps out humidity, which can help prevent rusting.
- It reduces noise transmission. If you live near a busy highway or noisy neighbors, you won’t be disturbed by all the noise while in your garage. Likewise, your activities, such as playing a musical instrument or using power tools, are less likely to disturb the neighbors and those inside your house.
- It can make starting your car easier. An insulated garage may help your car start on unusually cold days, and you’re also less likely to have battery issues.
- It can help protect your equipment. If a garage’s temperature gets too cold, the equipment you store there can also get damaged. If you have a power washer with some water remaining in the lines or pump, for instance, freezing and cracking can occur.
- It can make the summers more comfortable, too. If you live in a climate with hot summers, your insulated garage door can keep your garage a few degrees cooler during the hottest months. This could make a huge difference if you spend significant time working in your garage in the summer.
Prepare Your Garage for Winter With Garage Doors From Hunter Door
If you don’t want to go through the trouble of installing insulation for your existing door, there’s an easier option: replacing your door with an already insulated model.
At Hunter Door, we offer an extensive collection of insulated garage doors. Our doors come in a wide variety of colors, styles and degrees of insulation — so we’re confident you’ll be able to find a model that suits your personal tastes and insulation needs. We are a certified Clopay® dealer and also sell industry-leading brands such as ProVia, LiftMaster® and Genie®.
If you live in or around South Jersey, come to Hunter Door for all your garage door needs. In addition to selling high-quality garage doors, we also perform installations, repairs and even custom painting services to ensure your new door perfectly matches the look of your home.
If you have any questions regarding our products, contact us online or call us at 856-482-2325, and our knowledgeable representatives will be glad to assist you. You can also visit our showroom in person, and we’ll help you pick a door that best fits your budget and preferences.

